When looking at angled standing desks, our one-piece Corner Ryzer tabletops are often highly desired by users who prefer a desk surface that is completely flush and level. One of its main benefits is they do not have the crease that is found in two-piece tabletops where the tabletops meet. Another popular feature of the one-piece Corner Ryzer tabletops is their rounded inner area, allowing for more a comfortable working position when leaning on the desk or when working very near the inner side.
The one-piece Corner Ryzer tabletop has no pre-drilled holes; however, this would allow for the option to flip the tabletop and decide whether the grommet hole should face the left or right. In this article, we will cover all the steps that are required to successfully, and easily, install a one-piece Corner Ryzer tabletop.
Step 1: Gather All of the Required Tools and Parts
Before we can install this seamless tabletop for a corner desk, it is important to make sure we have all the required tools and parts available.
Required tools and parts:
- 1 x fully installed corner standing desk frame
- 1 x one-piece corner desk tabletop
- 1 x Phillips head screwdriver
- 12 x M5 x 20 Wood Screws
- 1 x pencil
- 1 x measuring tape (optional)
- 1 x electric drill (optional)
For a fully installed corner standing desk frame, please refer to our Corner Ryzer frame installation video below – this video shows how to install a two-piece tabletop, so keep reading this article to learn how to install the one-piece top! You can also refer to our Corner Ryzer user manual throughout the installation process.
Step 2: Position the Tabletop and Corner Standing Desk
Once the Corner Ryzer frame is assembled, the next step is to move the table lift frame to the desired final position on top of the upside-down tabletop. This may require two people to move the frame since it can be bulky and heavy once fully assembled.

Moving the table lift frame

Centering the table lift frame
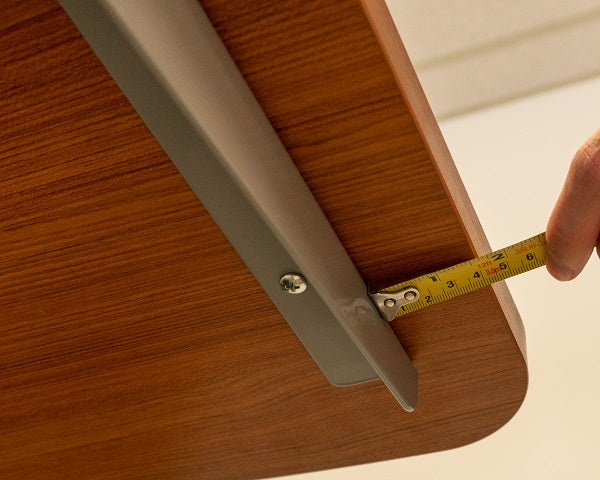
It is up to user preference on how the frame should be positioned onto the tabletop, however, our recommendation for stability and comfort would be to have an overhang of approximately 1.5 inches.

Positioning tabletop onto frame with 1.5-inch overhang
Step 3: Marking Areas for Pilot Holes
After positioning your tabletop for your corner desk, you may use a pencil to mark out the twelve tabletop mounting hole locations.

The twelve tabletop mounting hole locations

Marking out the pre-drilled holes
You should then remove the table lift frame from the tabletop once all pre-drilled holes have been marked out.

Step 4: Creating the Pilot Holes
To assist in the installation of your tabletop once it is right side up, we recommend creating pilot holes. Use a Phillips Head Screwdriver to install the 12 M5 x 20 Wood Screws onto the previously pencil marked locations. Only 1/4 of each screw's length needs to be screwed into the tabletop. Once all the pilot holes are completed, we would then remove all the screws.
Optional: An electric drill may be used to create pilot holes instead of the wood screws.

Creating new pilot holes
Step 5: Flip the Corner Ryzer Frame Right-Side Up
For this step, it is advised that you use two or more people for flipping the table lift right-side up. To make the flipping process easier, the Frame End and Center Rails connected to the Secondary Frame can also be temporarily detached by loosen the screws connecting the Center Rails to the Secondary Frame.
You can then detach the entire subassembly and flip all the sub-assemblies right-side up. Once upright, reattach the subassembly and do not fully tighten the screws on the Center Rails to allow for future adjustments if required.

Corner Ryzer frame right-side up
Step 6: Attaching the Tabletop
The next step is to place your tabletop into the desired position on the top side of the Corner Ryzer frame.

Tabletop positioned onto the Corner Ryzer frame
Finally, tightly secure the tabletop onto the Corner Ryzer frame by using a Phillips Head Screwdriver to screw the 12 M5 x 20 Wood Screws until the Rubber Grommets attached to the Side Brackets are slightly compressed but not flattened.

Once all 12 M5 x 20 Wood Screws are tightly secured, your corner standing desk is fully assembled and ready for use.

Fully assembled corner standing desk
Conclusion
To summarize, our one-piece tabletop for a corner desk offers a rounded and flush work surface but requires a few extra steps for installation. By using a few tools and spending some time to follow our step-by-step guides, you too can have your very own fully assembled corner stand up desk!
You may also be interested in learning about our other standing desks, or optimizing your workspace with our standing desk accessories.
If you have any further questions about this article, or just queries in general, you may call us at 1-800-828-9414 or email us at sales@progressivedesk.com – we’ll be happy to help!


